How to Construct a Console Table From a Single Sheet of Plywood
#ConsoleTable Project Directions
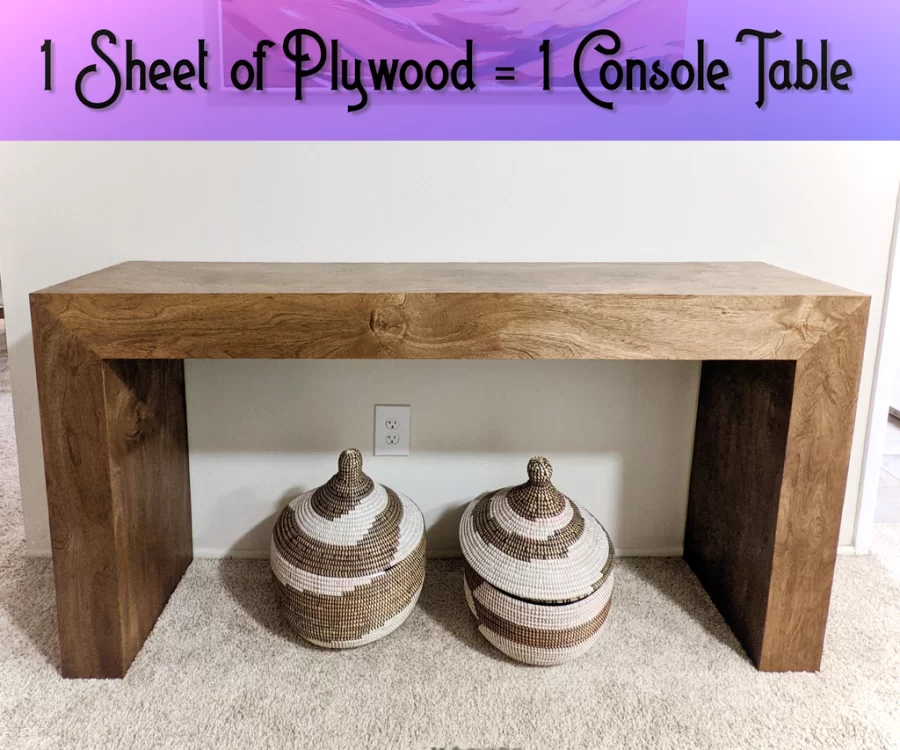
Image From Original Directions – https://www.instructables.com/1-Plywood-Sheet-1-Console-Table/
Using a single sheet of 4′ x 8′ plywood and minimal instructions, you can construct a phenomenal, lightweight, solid, wood-styled console table.
Materials
-¾ inch sheet of 4′ x 8′ plywood
-Wood conditioner
-Wood Stain
-Polyurethane
-Wood Glue
-Wood Filler
Tools
-Clamps
-Measuring Tape
-Saw
-Orbital Sander
-Sandpaper
-Paint Brush
-Old T-Shirt or Towel
-Pencil
-Ruler
-Protractor
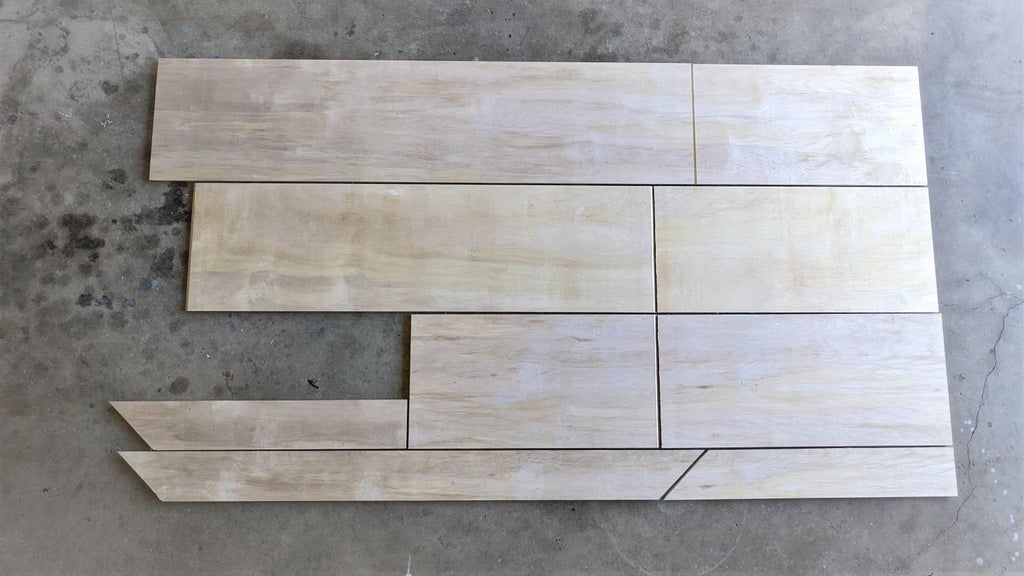
Part 1 – Measuring and Marking
- Measure the dimensions of the plywood with measuring tape to ensure the exact numbers.
- Measurements for the wood and the name of each individual piece can be found HERE.
- Using a pencil, a ruler, and a protractor, lightly mark the sizes of each part of the table by making straight lines.
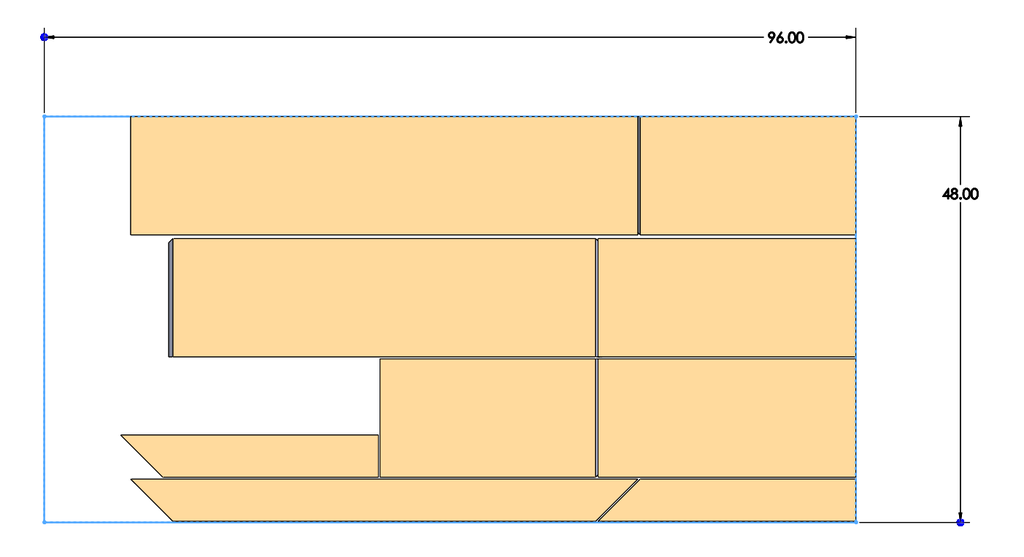
Image From Original Directions – https://www.instructables.com/1-Plywood-Sheet-1-Console-Table/
Part 2 – Cutting Wood
- Sand the entire sheet of plywood with 240, 320, then 400 grit sandpaper with an orbital sander.
- Place the plywood on a table and clamp it down tight.
- Take a saw and carefully cut the plywood on the drawn lines.
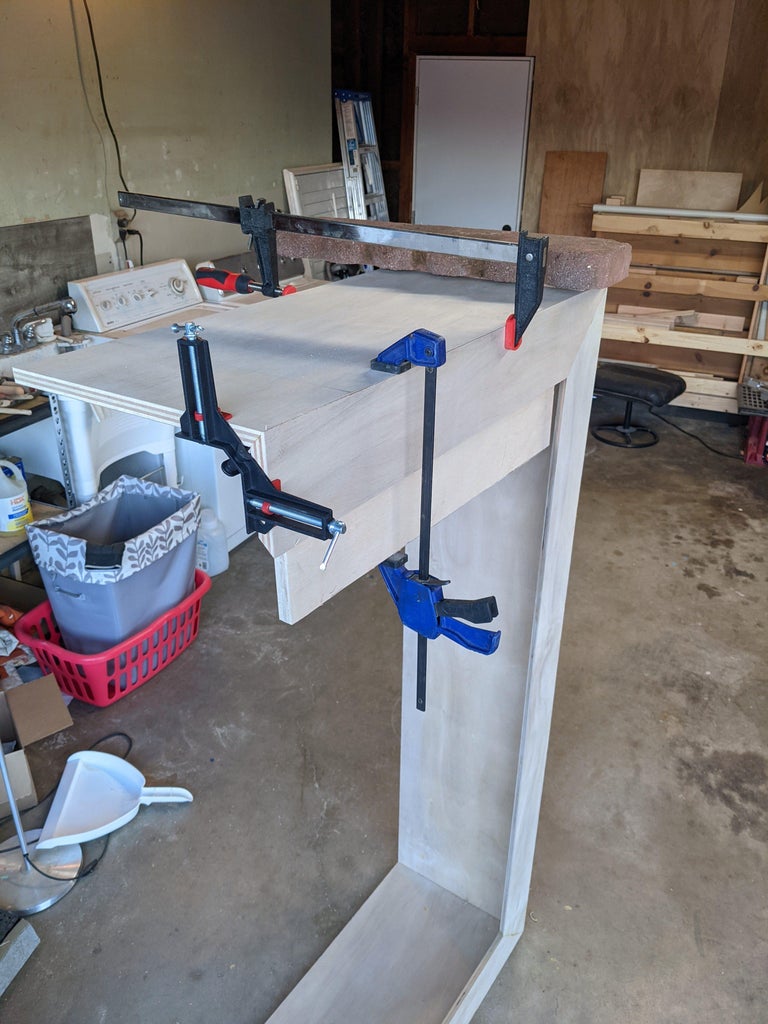
Part 3 – Construction
- Take the the parts of the plywood needed to make the front face (right front panel, left front panel, top front panel) and glue them together with wood glue.
- Once the top face dries, glue together the top face and the side faces (top outer panel, right outer panel, left outer panel).
- Make sure to spread the glue evenly and clamp parts together
- Once the side faces are dry, glue the top inner panel and the inside faces (right inner panel, left inner panel).
- When all the faces are glued, add wood filler to the gaps.
- Once wood filler has dried, sand the edges of the table with 400 grit sandpaper by hand until satisfied with the shape.
- Using a rag or a brush, cover the entire table with lots of wood conditioner and leave it on for 30 minutes.
- After 30 minutes, use a rag to wipe off the extra wood conditioner and let it cure for 2 hours.
- Once wood has dried, use a rag to wipe off excess sawdust. Using a brush, working in small areas, coat the wood with wood stain, then quickly wipe it off.
- Using a fine brush, apply polyurethane in large areas to avoid streaks and gaps.
- After applying the first coat of polyurethane, sand over the dry surface with 800 grit sandpaper.
- Apply a second coat of polyurethane in large areas.
- Possibly apply a third coat if needed.
After that final step, your console table is complete. Those are the steps to constructing a console table out of a single sheet of plywood.
Link to Original Directions:
https://www.instructables.com/1-Plywood-Sheet-1-Console-Table/