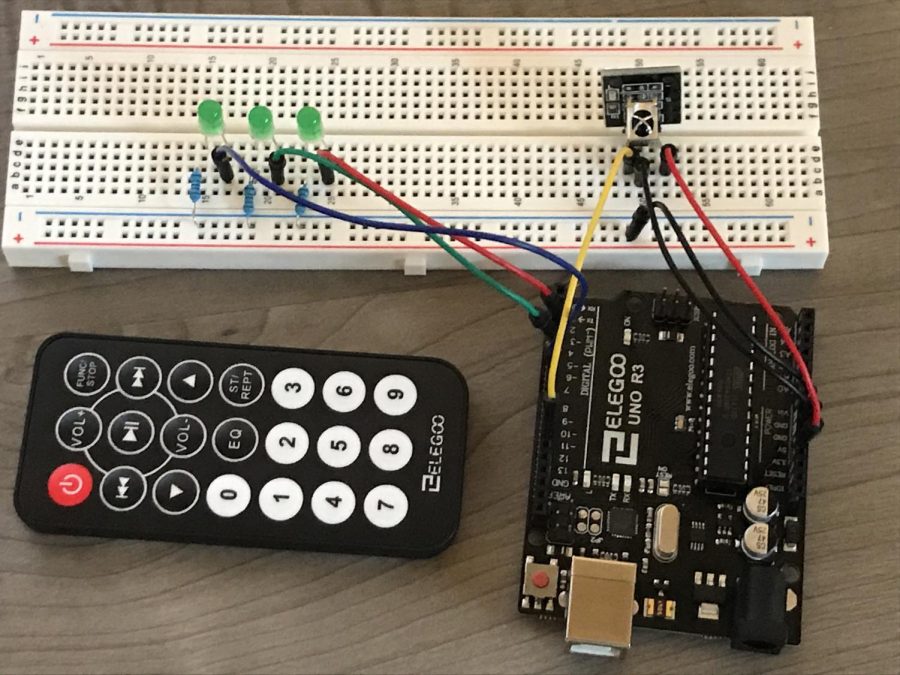
Elegoo Arduino Uno R3 – Control an LED with the Remote Control
The Arduino Uno is an amazing piece of Technology that you can do projects with. One project that I will be explaining here for you is how to control lights with an IR Remote and Receiver.
List of materials needed:
IR receiver, IR remote, 3 LED lights, An 830 Tie-Points breadboard The Arduino Uno(including a charger cable it does not run on its own), and some wires to connect everything(at least 7 wires are needed).
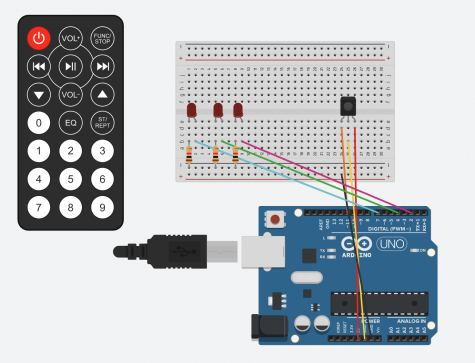
The First step is the set up the hardware that you will need for the project. Below is a diagram of how you should put all the pieces together. (If it isn’t clear orange wire goes into ~11, the black wire goes into GND, the yellow wire goes into the other GND, and the red wire goes into 5V)
The Code:
The code below will make the Arduino work for the leftmost two lights. It will use keypad buttons 2 and 5. In put this code into the Arduino software app then download it to the board and it should work.
#include <IRremote.h>

const int RECV_PIN = 7;
IRrecv irrecv(RECV_PIN);
decode_results results;
const int redPin = 10;
const int greenPin = 11;


void setup(){
  irrecv.enableIRIn();
  irrecv.blink13(true);
  pinMode(redPin, OUTPUT);
  pinMode(greenPin, OUTPUT);
}

void loop(){
    if (irrecv.decode(&results)){

        switch(results.value){
          case 0xFF38C7: //Keypad button "5"
          digitalWrite(redPin, HIGH);
          delay(2000);
          digitalWrite(redPin, LOW);
          }

        switch(results.value){
          case 0xFF18E7: //Keypad button "2"
          digitalWrite(greenPin, HIGH);
          delay(2000);
          digitalWrite(greenPin, LOW);
          }

        irrecv.resume();
    }
}
Related stories:
