How To Make A Joystick Controlled Mouse With Elegoo Arduino Uno-R3
If you want to make this joystick-controlled mouse, this is the right place for you. But before we start I just want to put out there that it did not work for me I think it was because this computer that I’m on does not have a lot of hardware so I don’t know if it worked. But hopefully, it works for you guys that are reading this. These are the things that you will need to do this project:
5 Female-to-Male Dupont Wires
1 UNO R3 Board
1 Joystick Module
1 Joystick Handke
1 USB Cable
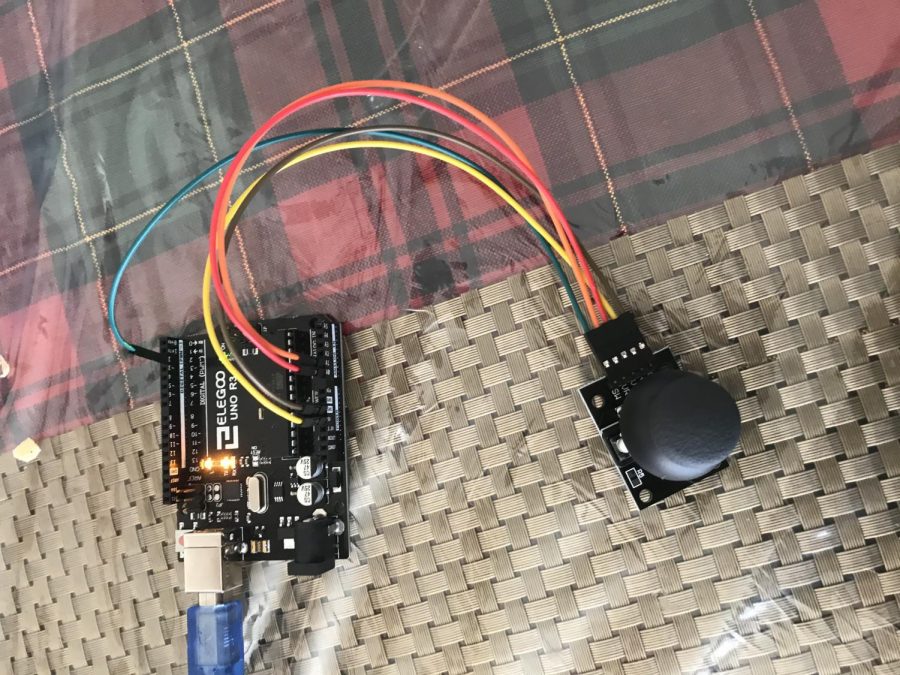
So for the wiring, you would need to connect your first wire to GND, (which is ground) then on your R3 board connect it to the Ground. For your Second wiring, you want to connect it to +V5 (which is 5 volts) and on your board to 5V. The next wiring is VRx (which is the x-axis) to A0. The second to last wiring is VRy (which is the y-axis) to A1. And for the last wiring is SW (which is the switch) to number 2. Once you are done with that go to the Arduino software and I will give you the code at the bottom.
int Xpin=A0;
int Ypin=A1;
int Spin=2;
int Xval;
int Yval;
int Sval;
int dt=200;
void setup() {
// put your setup code here, to run once:
Serial.begin(9600);
pinMode(Xpin,INPUT);
pinMode(Ypin,INPUT);
pinMode(Spin,INPUT);
digitalWrite(Spin,HIGH);
}
void loop() {
// put your main code here, to run repeatedly:
Xval-analogRead(Xpin);
Yval=analogRead(Ypin);
Sval-digitalRead(Spin);
delay(dt);
Serial.print(“X Value = “);
Serial.print(Xval);
Serial.print(” Y Value = “);
Serial.print(Yval);
Serial.print(” Switch State is “);
Serial.println(Sval);
}
Once you put the code hit the right arrow so it can upload and the go-to tool, then to Serial monitor. Or you can also hit Ctrl+Shift+M. Then once you are at the Serial monitor you click on it and there will be a new tab and when you move the joystick around the monitor catches what angle you are moving it. You can also move it around and numbers change every time you move it in a different direction.
