Arduino Elegoo Blink Project Engineering Notebook
https://learn.adafruit.com/adafruit-arduino-lesson-1-blink/loading-the-blink-example
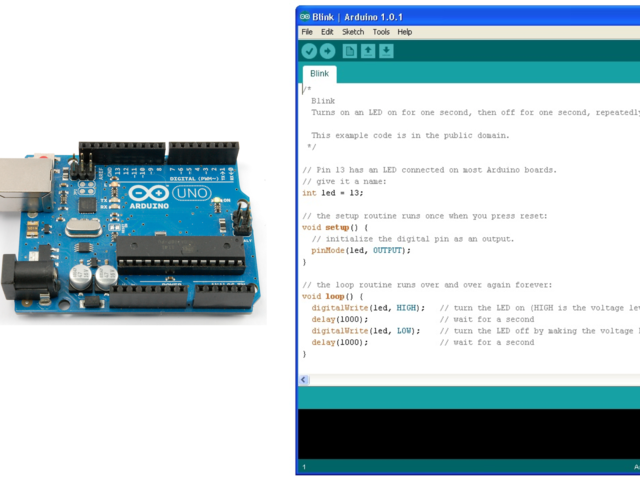
In this article, you will learn to blink an LED using Arduino. You will need any Arduino kit that has the following items inside: an LED light, an Arduino R3, and a cord that pugs into your computer an into the Arduino R3 board piece. I would personally recommend the Arduino Elegoo Starter Kit for this project and other beginner projects. You will also need the Arduino software downloaded on your computer. The code will be in the video and image beside the article along with instructions on how to blink an LED light. The first thing you need to do it take out your LED and put it in the Pin 13 spot and GND spot on your Arduino R3. Make sure to put the longer lead (positive) into Pin 13 and put the shorter lead (negative) in the GND spot. Then, take the cord and plug one end into your computer or laptop and take the other end and put it in your Arduino R3. You can now go to the video or image and see what code to put in to your Arduino. Make sure to put every bit of code on your software in the video except the part at the end in gray text.
RELATED STORIES:
https://learn.adafruit.com/adafruit-arduino-lesson-2-leds/blinking-the-led