#BUBBLES – Completion Instructions
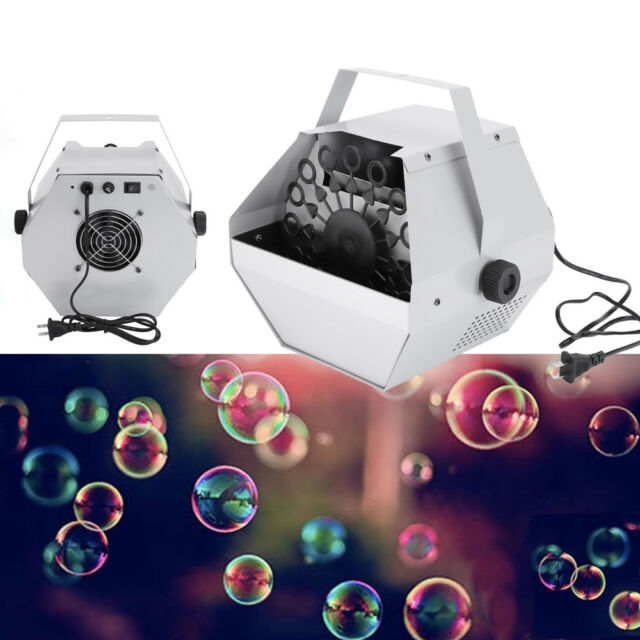
Source: Ebay.com
As of January 23rd, 2020, our project is about three fourths of the way completed. We are building a motion activated bubble machine. Here are the complete instructions to complete the project. (Project by Soccerpotato and s0cceRcat23)
- Coding – If you do not already have the program, download the Arduino program to your computer. We are using an Arduino Uno R3. The code needs to tell the Arduino to turn on both motors for the fan and the disc. There is also a battery involved. We attempted to start the code, but it was extremely difficult. We suggest you learn properly how to code in the Arduino language before you start coding for the project.
- When you open the program, it will open up to a “sketch” – this is what needs to be uploaded to the Arduino through the blue cord that connects your computer to the Arduino.
- The part that says “setup” is the set of commands that runs once before the actual code is followed. The part that says “loop” is the code that runs forever until you tell it not to. Or in this case, when the sensor is no longer activated.
- To start learning the code, go to the Arduino website where it tells you what each part of the code means. Compared to other languages, the Arduino language is supposed to be a piece of cake to learn.
- Resistors – The motor for the disc spins way too fast for its purpose. It needs to spin slow enough to let the fan blow the bubbles through the drilled holes. We think you need to use a resistor for this purpose but there might be something else you can use that is more efficient. If a resistor is the correct piece you need, you need to learn Ohm’s law and how to read resistor codes. If you find a resistor, you can look closely and see that it has several different colored lines that tell you it’s tolerance. Using that information, you can find out what specific type of resistor you need to use for this job.
- Circuit – As far as we know, the circuit in the picture does it’s job. We followed several tutorials online which told us where to put the pins and jumper wires. If you get to the coding part and you figure out that you need to switch some wires around, by all means do so because we haven’t gotten far enough in the coding to check that. Once you are absolutely sure that your code is correct, you can upload the sketch to the Arduino and solder the circuit together.
- The circuit can be confusing, so be sure to follow the pictured instructions carefully. Always make sure that all of the wires are in the correct place before you solder.
- Again – feel free to change the circuit if you think it will work better in a different way. Our circuit is not complete in real life, and when we drew the diagrams we were mostly relying on the sixth grade circuits unit knowledge to help us. Just make sure you double check the circuit before you solder anything or connect it permanently.
- Structure – The PIR sensor (the small green board with the white dome) needs to be secured under the blue bottle cap, with the dome facing away from the Arduino. This is so it is actually able to detect infrared radiation.
- The fan motor goes on top of the little elevated ledge. It needs to blow air through the holes on the slowly rotating disc.
- The disc motor goes on the extended ledge. It needs to line up with the hole in the water bottle that holds the bubble fluid.
- The Arduino and battery go behind the motor table and water bottle.
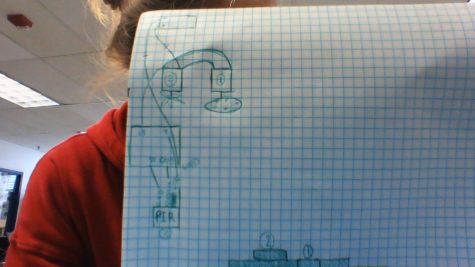 <—– Circuit design
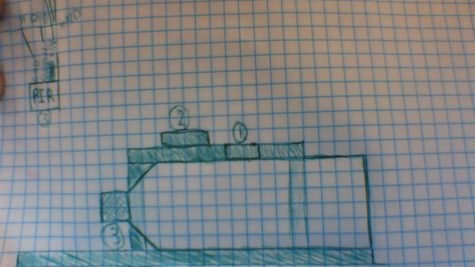 <—- Structure design
- Links – Here are some links we used that may help you:
- https://www.youtube.com/watch?v=m-xgzLjEsvs
- https://www.youtube.com/watch?v=CWFRqQhGa6w
- https://www.instructables.com/id/Motion-Sensitive-Bubble-Machine-with-littleBits/
- https://hackaday.io/project/27247-soap-bubble-machine
- https://www.youtube.com/watch?v=72fMOP3hZHw
- https://makezine.com/2014/08/20/building-a-makeshift-bubble-machine/
- https://www.instructables.com/id/Bubble-Machine/
- https://esfstream.com/tag/raspberrypi/
- https://www.instructables.com/id/Motion-Sensor-Introdution/
- https://www.instructables.com/id/PIR-Motion-Sensor-With-Arduino-Motion-Sensors-Ardu/
- https://www.instructables.com/id/Arduino-Bubbles-Machine/
- https://www.youtube.com/watch?v=4xa_NImUFV0
- https://howtomechatronics.com/tutorials/arduino/how-pir-sensor-works-and-how-to-use-it-with-arduino/
- https://www.youtube.com/watch?v=CWFRqQhGa6w
- https://circuits-diy.com/interfacing-pir-motion-sensor-with-arduino/
- Good luck! We hope that you enjoy this project. We have some other papers in real life that you can use (they’re cut outs from our notebooks) that have the diagrams of the structure and circuits on them. Our Arduino kit is labeled #BUBBLES and our drawer is the second on the right in B2a